Custom Objects
Last updated: January 26, 2026
To personalize your space, you can upload custom images as decorative or interactive objects. For example, you might want to add your company logo to the lobby, your mission statement on the wall, or special decor for the All Hands room.
Add Custom Objects from the Build Tool
You'll need access to the Build Tool or Mapmaker to follow this guide. If you do not see these options, you may need to talk to one of your space Admins about changing your User Role and Permissions.
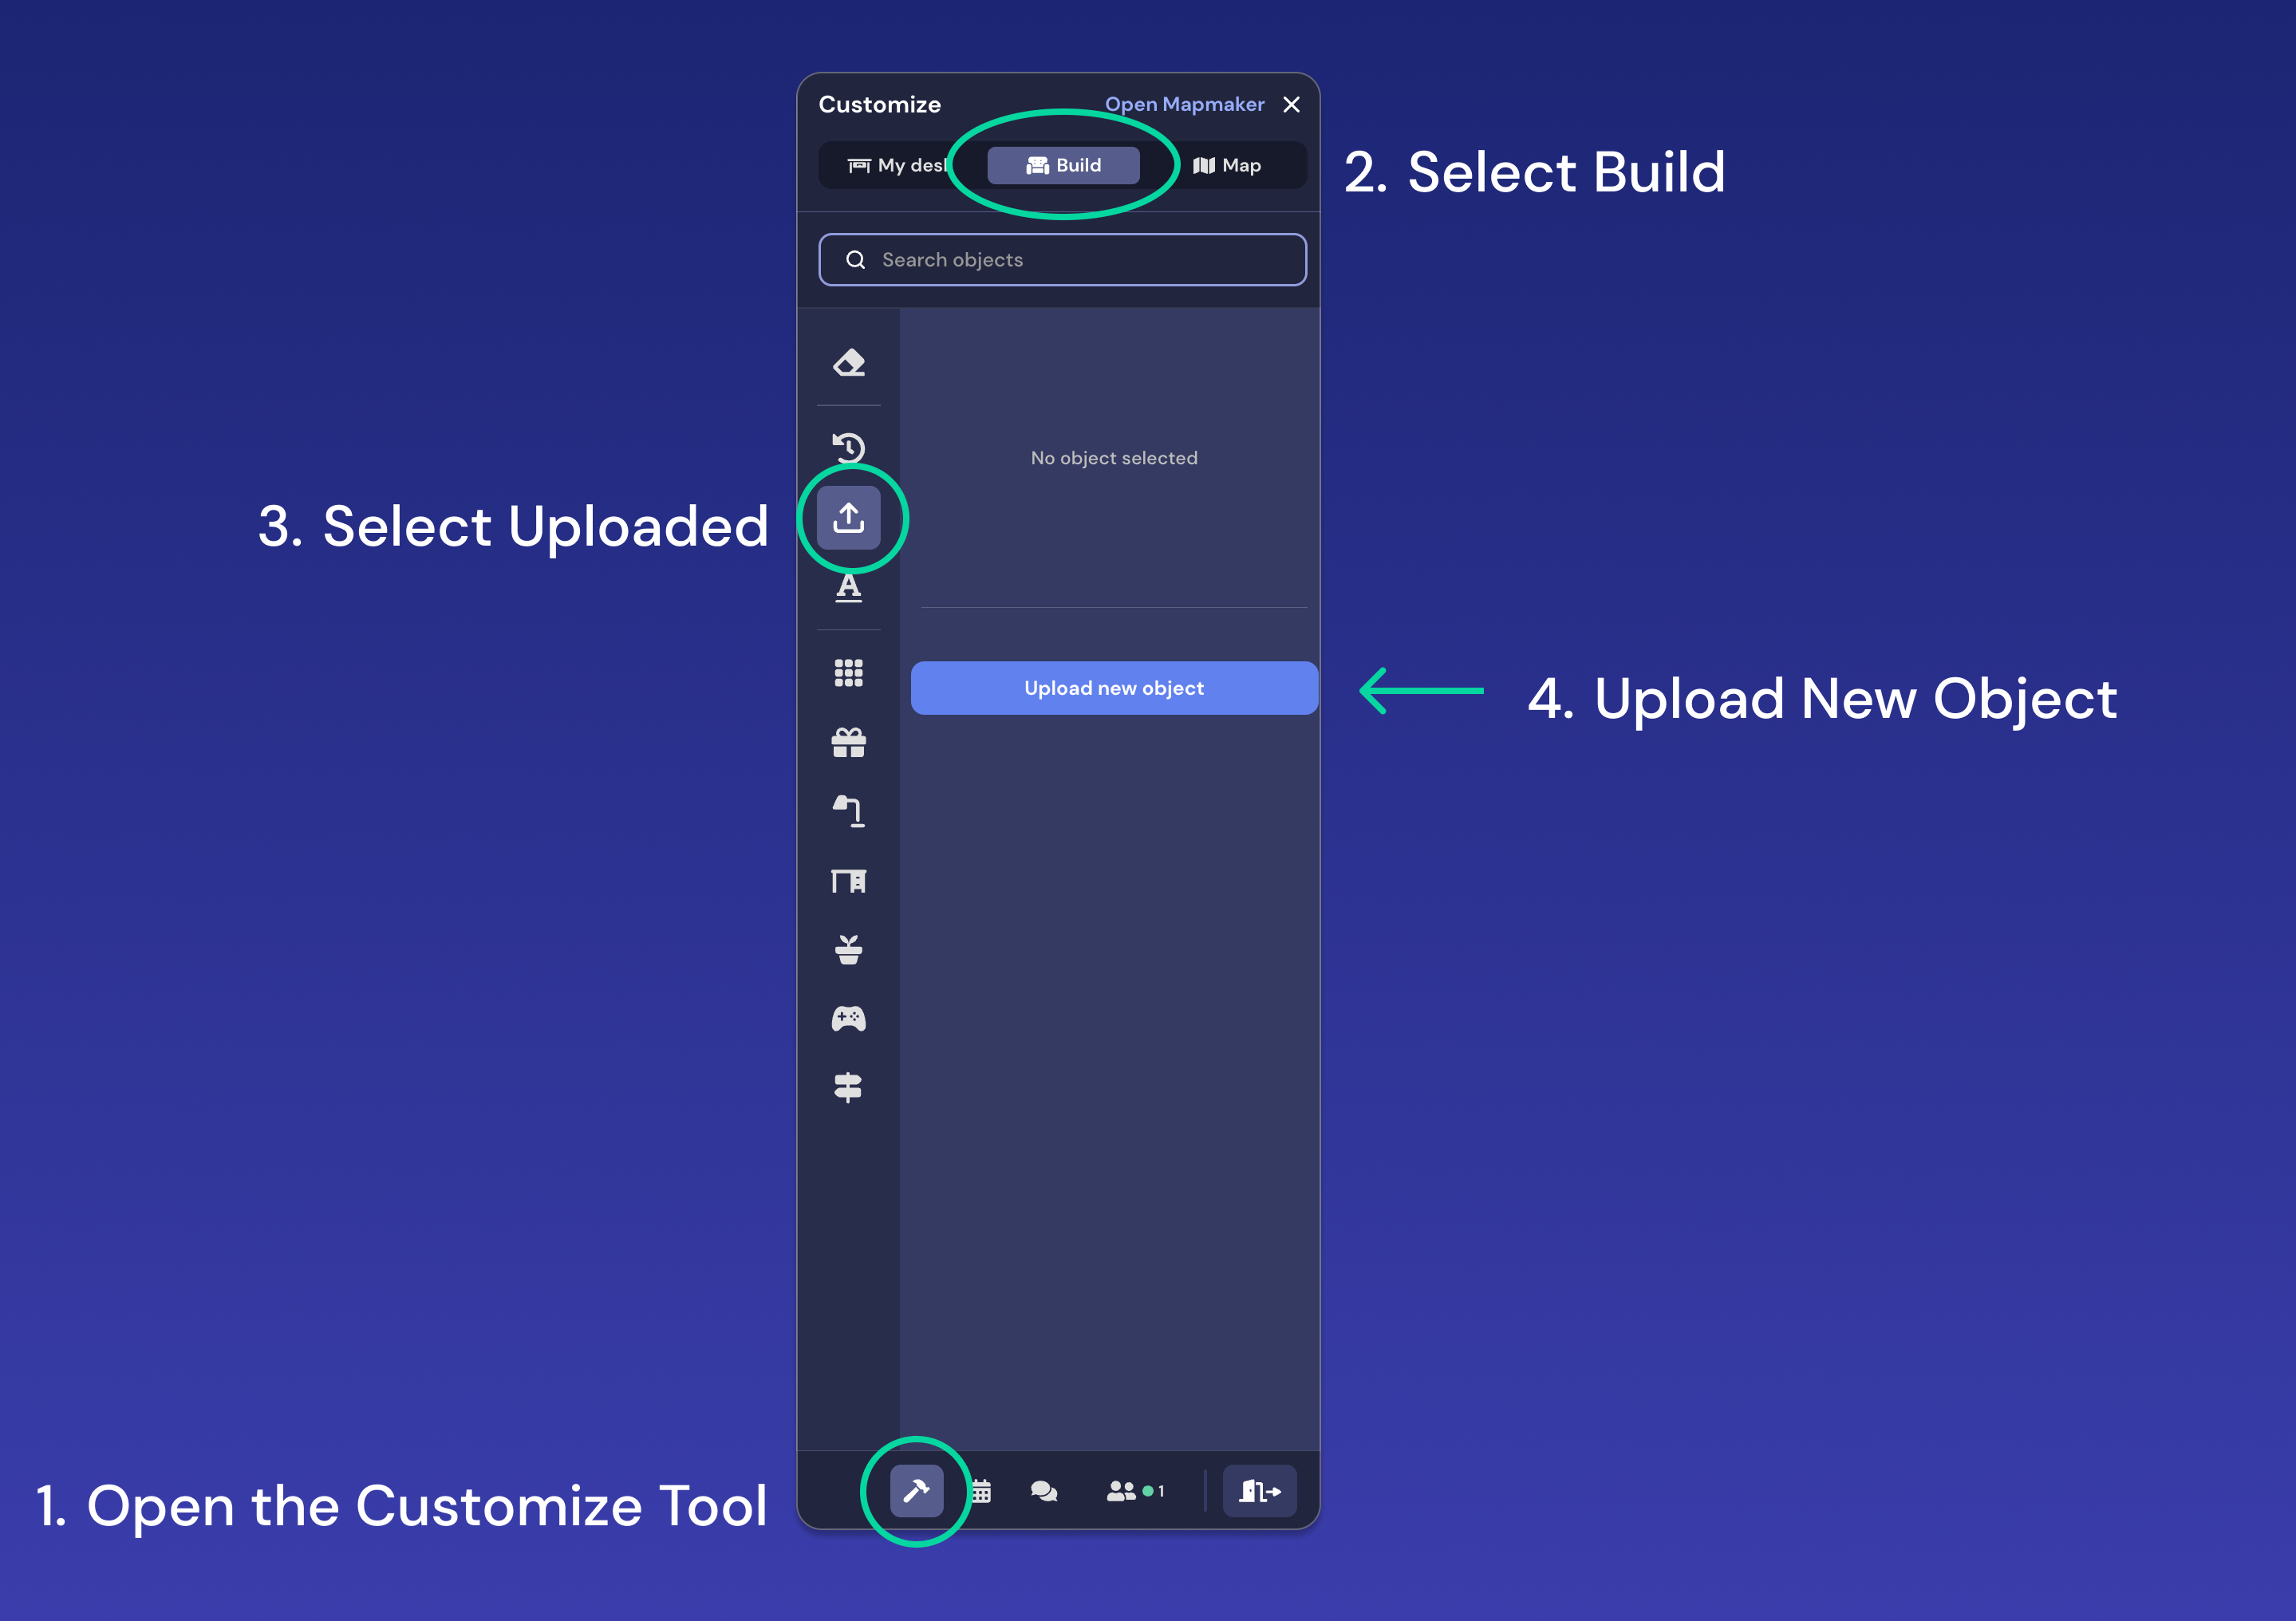
To add a custom object from the Build Tool, open the Customize panel from the bottom navigation bar. Click on Build at the top, and then select Uploaded.
You'll see a button to Upload new object. Once you've uploaded a custom image, you'll see the object displayed in this tab.
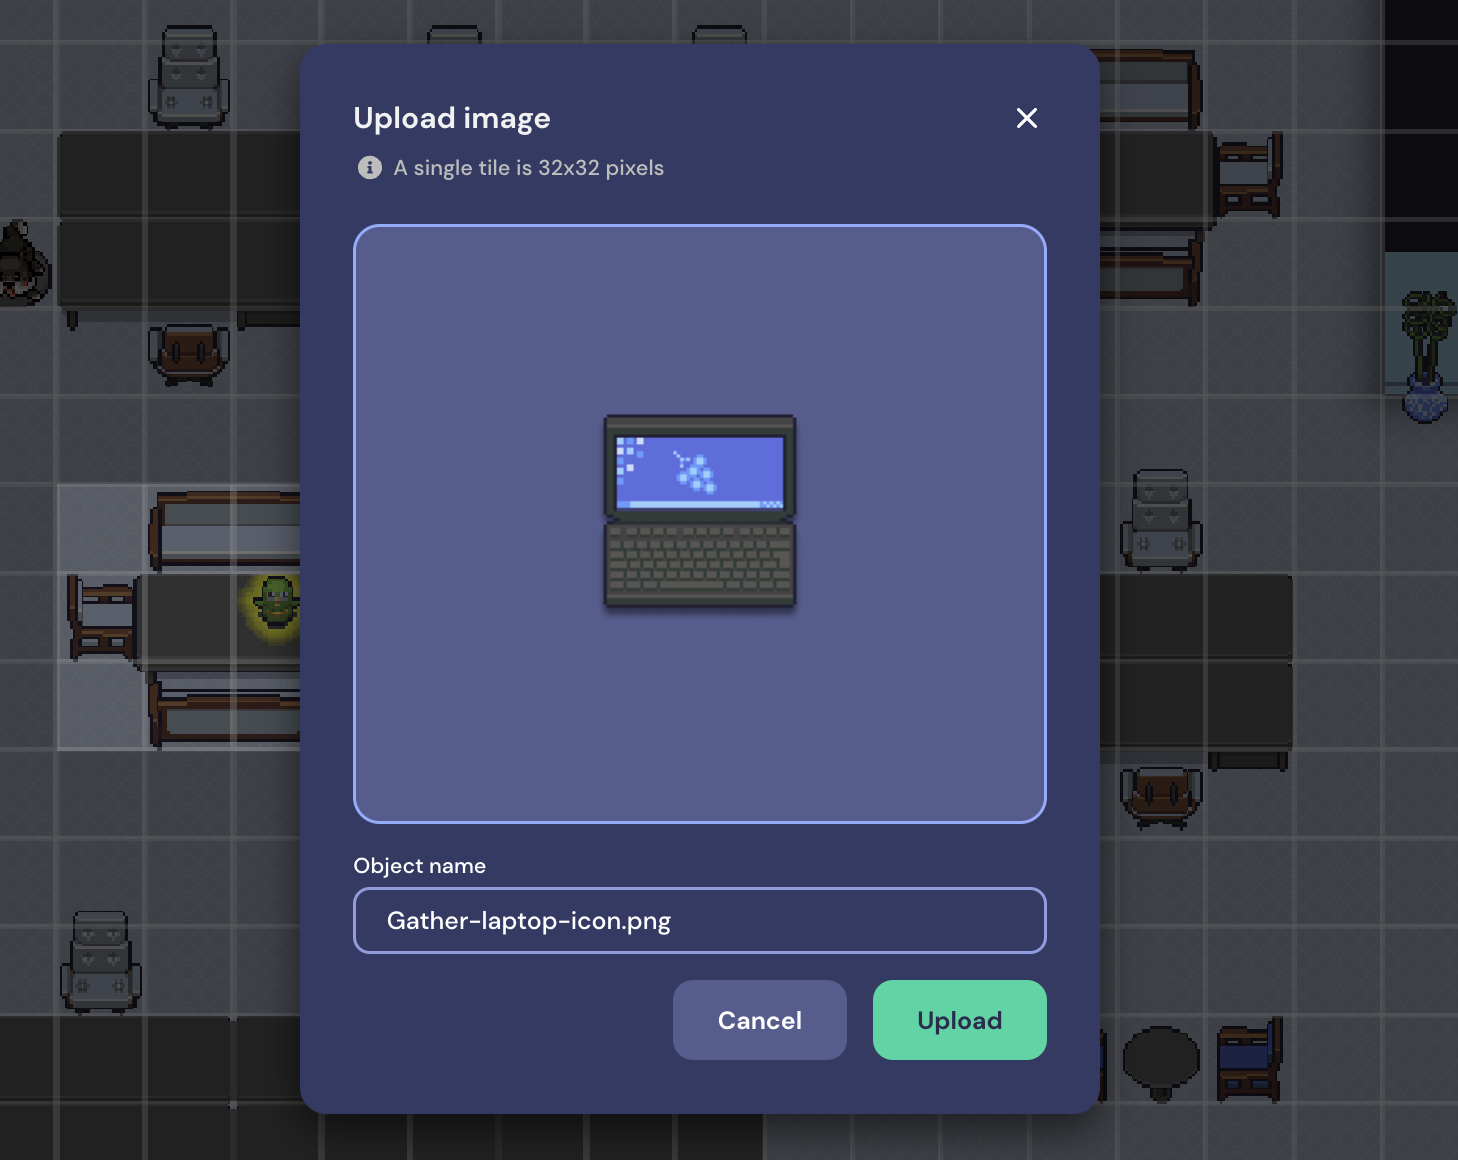
Drag your image into the window or click to select a file to upload.
You will not be able to resize the image once it's uploaded. If you need to change the size, please do that with an image editing tool before uploading. Learn more about Gather Size Guidelines here.
Once you've uploaded your image, a preview will display along with the file name beneath. Click Upload.
Now you can place your custom object in your space. It will act like any other object, meaning you can make it interactive, erase it, or place it more than once.
When you upload a custom object, you'll be the only person that can place that object. It does not get added to the Object Picker for your teammates to use. If multiple people would like to place a specific custom object, you'll each need to upload it on your own.
Once you've uploaded a custom object, you cannot remove it from your custom object library.
Add Custom Objects from the Mapmaker
- Open the Mapmaker and select the Objects tab at the top.
- Click More Objects in the panel at the right.
- The Object Picker window will open. Select Upload New in the lower left.
- Drag your image or click to upload.
- Add object details and click Create and Select when ready.
- Click on the map to place your custom object.
Guidelines for Managing Custom Objects
- If you upload a custom object in the Build Tool, you'll see it listed in the Uploaded section every time you re-open the Build Tool.
- If you upload a custom object in the Mapmaker, you'll see it listed in recent objects only during the same session. If you exit and re-open the Mapmaker, the custom object will no longer show in the Objects panel.
- It is not currently possible to view previously uploaded custom objects within the Objects panel of the Mapmaker. If you want to re-use a previously uploaded custom object, it's best to select it on the map and then copy/paste to a new location on the map.
- The Build Tool and Mapmaker do not share custom objects. For example, if you upload via the Build Tool, you won't be able to find the custom object in the objects list in the Mapmaker, and vice versa.
Add Your Company Logo
To make your office feel like it truly belongs to your team, you can easily add your company logo.
To do this, you can either follow the steps above for adding a custom object or you can upload the logo directly to your office lobby.
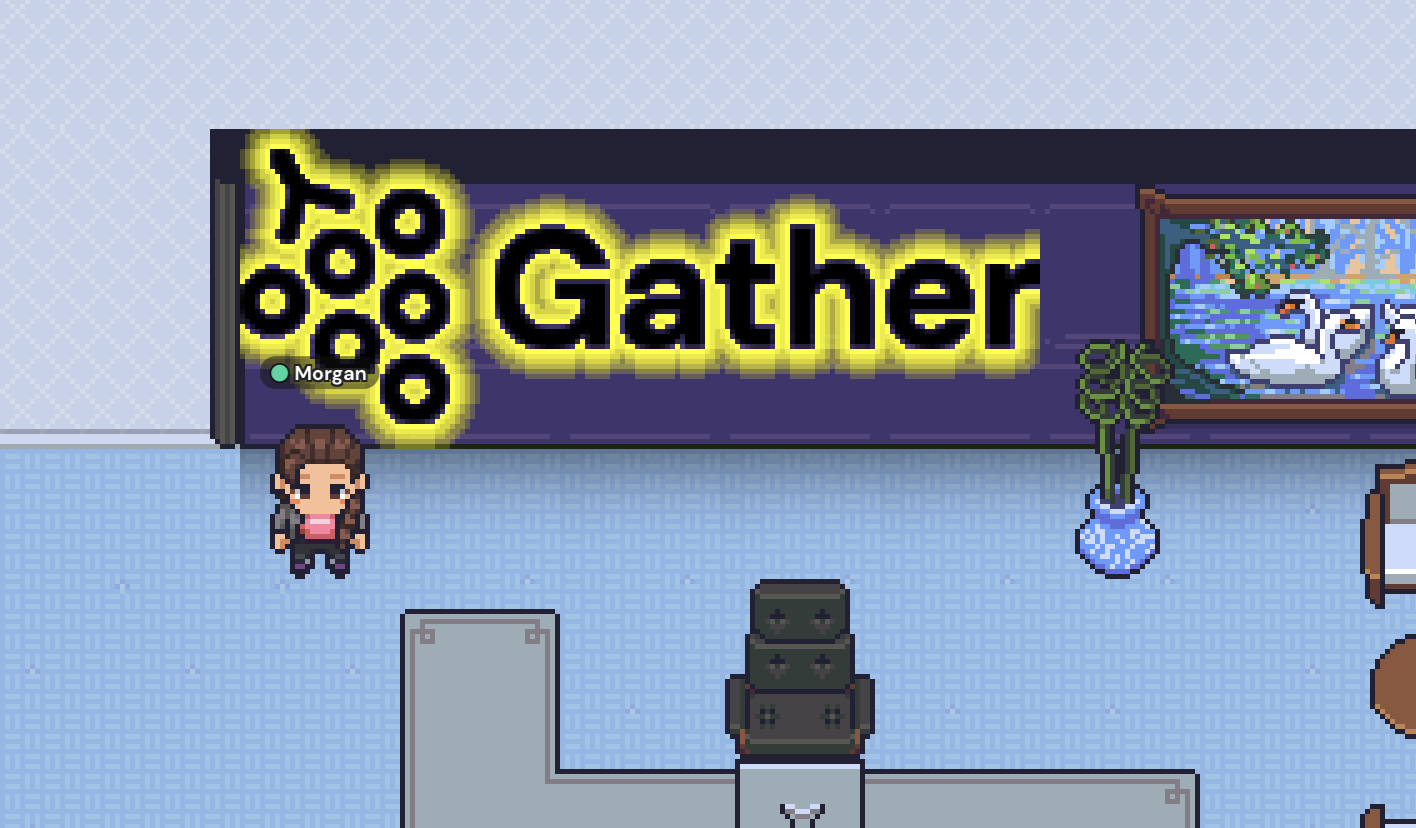
Look for the sign that says "Your Logo Here." When you walk up to it, you can press 'x' to interact with the object and upload your own logo.

We'll automatically size your logo to a 2 x 5 tile size. The object will be outlined in yellow to indicate you can interact with it and change the file whenever you want.
Best Practices
You can customize Gather to match any style or aesthetic you'd like. If you want to match Gather's pixel art style, you can use online tools to create your own, convert images into pixel art, or search for pixel art online.
Recommendations:
- Tiles in Gather are 32x32 pixels. If you're adding an object for your desk or another small space, keep your image close to those dimensions.
- If you're placing an object to look like a poster hanging on a wall, make it shorter than 50 px (the height of the walls in Gather).
- Resize your image before you upload it to Gather. We don't currently offer a way to resize the object once it's been uploaded.
- Keep your images tightly cropped unless you want to have built-in space around them.
- Make sure your image has a transparent background. (Unless you want it to have a background, of course.)
- Save your image as a .png no larger than 3 MB. (You can use .jpg but quality is better in .png).
- Check out our Git repo of maps, tilesets, and assets.
- If you're interested in creating a lot of custom pixel art objects, we recommend using a dedicated pixel art program like Asesprite.
- Adding outlines, frames, and shadows can go a long way to help images feel like an object in Gather rather than a flat image.